Plan a cohesive diy wedding

What makes you a do-it-yourself bride? You might be on a budget or simply want to add personal touches to your wedding day. Enthusiastic as you are to hand make your decor, where the heck to you begin?
Choose a Theme
Amongst the plethora of wedding themes, you’ll land on one that you love. Vintage, glamour, romantic, outdoor, seaside, Cinderella? Where to begin? Consider your venue, music and season to create mood boards with photos that strike a chord on your heart strings. There are plenty of websites to find inspiration. But if you’re a tactile person like me, you can start putting aside elements that you come across to create a physical mood board. Save fabrics that you love, or flowers and knick-knacks that spark a wedding vibe.

Cohesiveness
Once you settle on a theme, pick out a few components to unite your decor and setting. For instance, lace and hessian or burlap is great starting point for a country style wedding. You can pick up the colour in the burlap with wooden pieces. The lace will tie in the white tones or texture in your classic dress. Use the same colour scheme and textiles throughout the venue to quite literally “interlace” the theme cohesively.
Table Runners
Let’s start with decorating the tables. Not only are white linens classic and highly accessible, every wedding venue provides them. Instead of hiring stylish tablecloths, use the venue’s supply and spruce up the table setting with your home sewn runners. Find hessian and wide lace at any fabric store. Leave the raw edges for a rustic wedding or hem the fringe for a more refined look. Don’t forget to make a few extra for the cake and gift tables.

Centerpeices
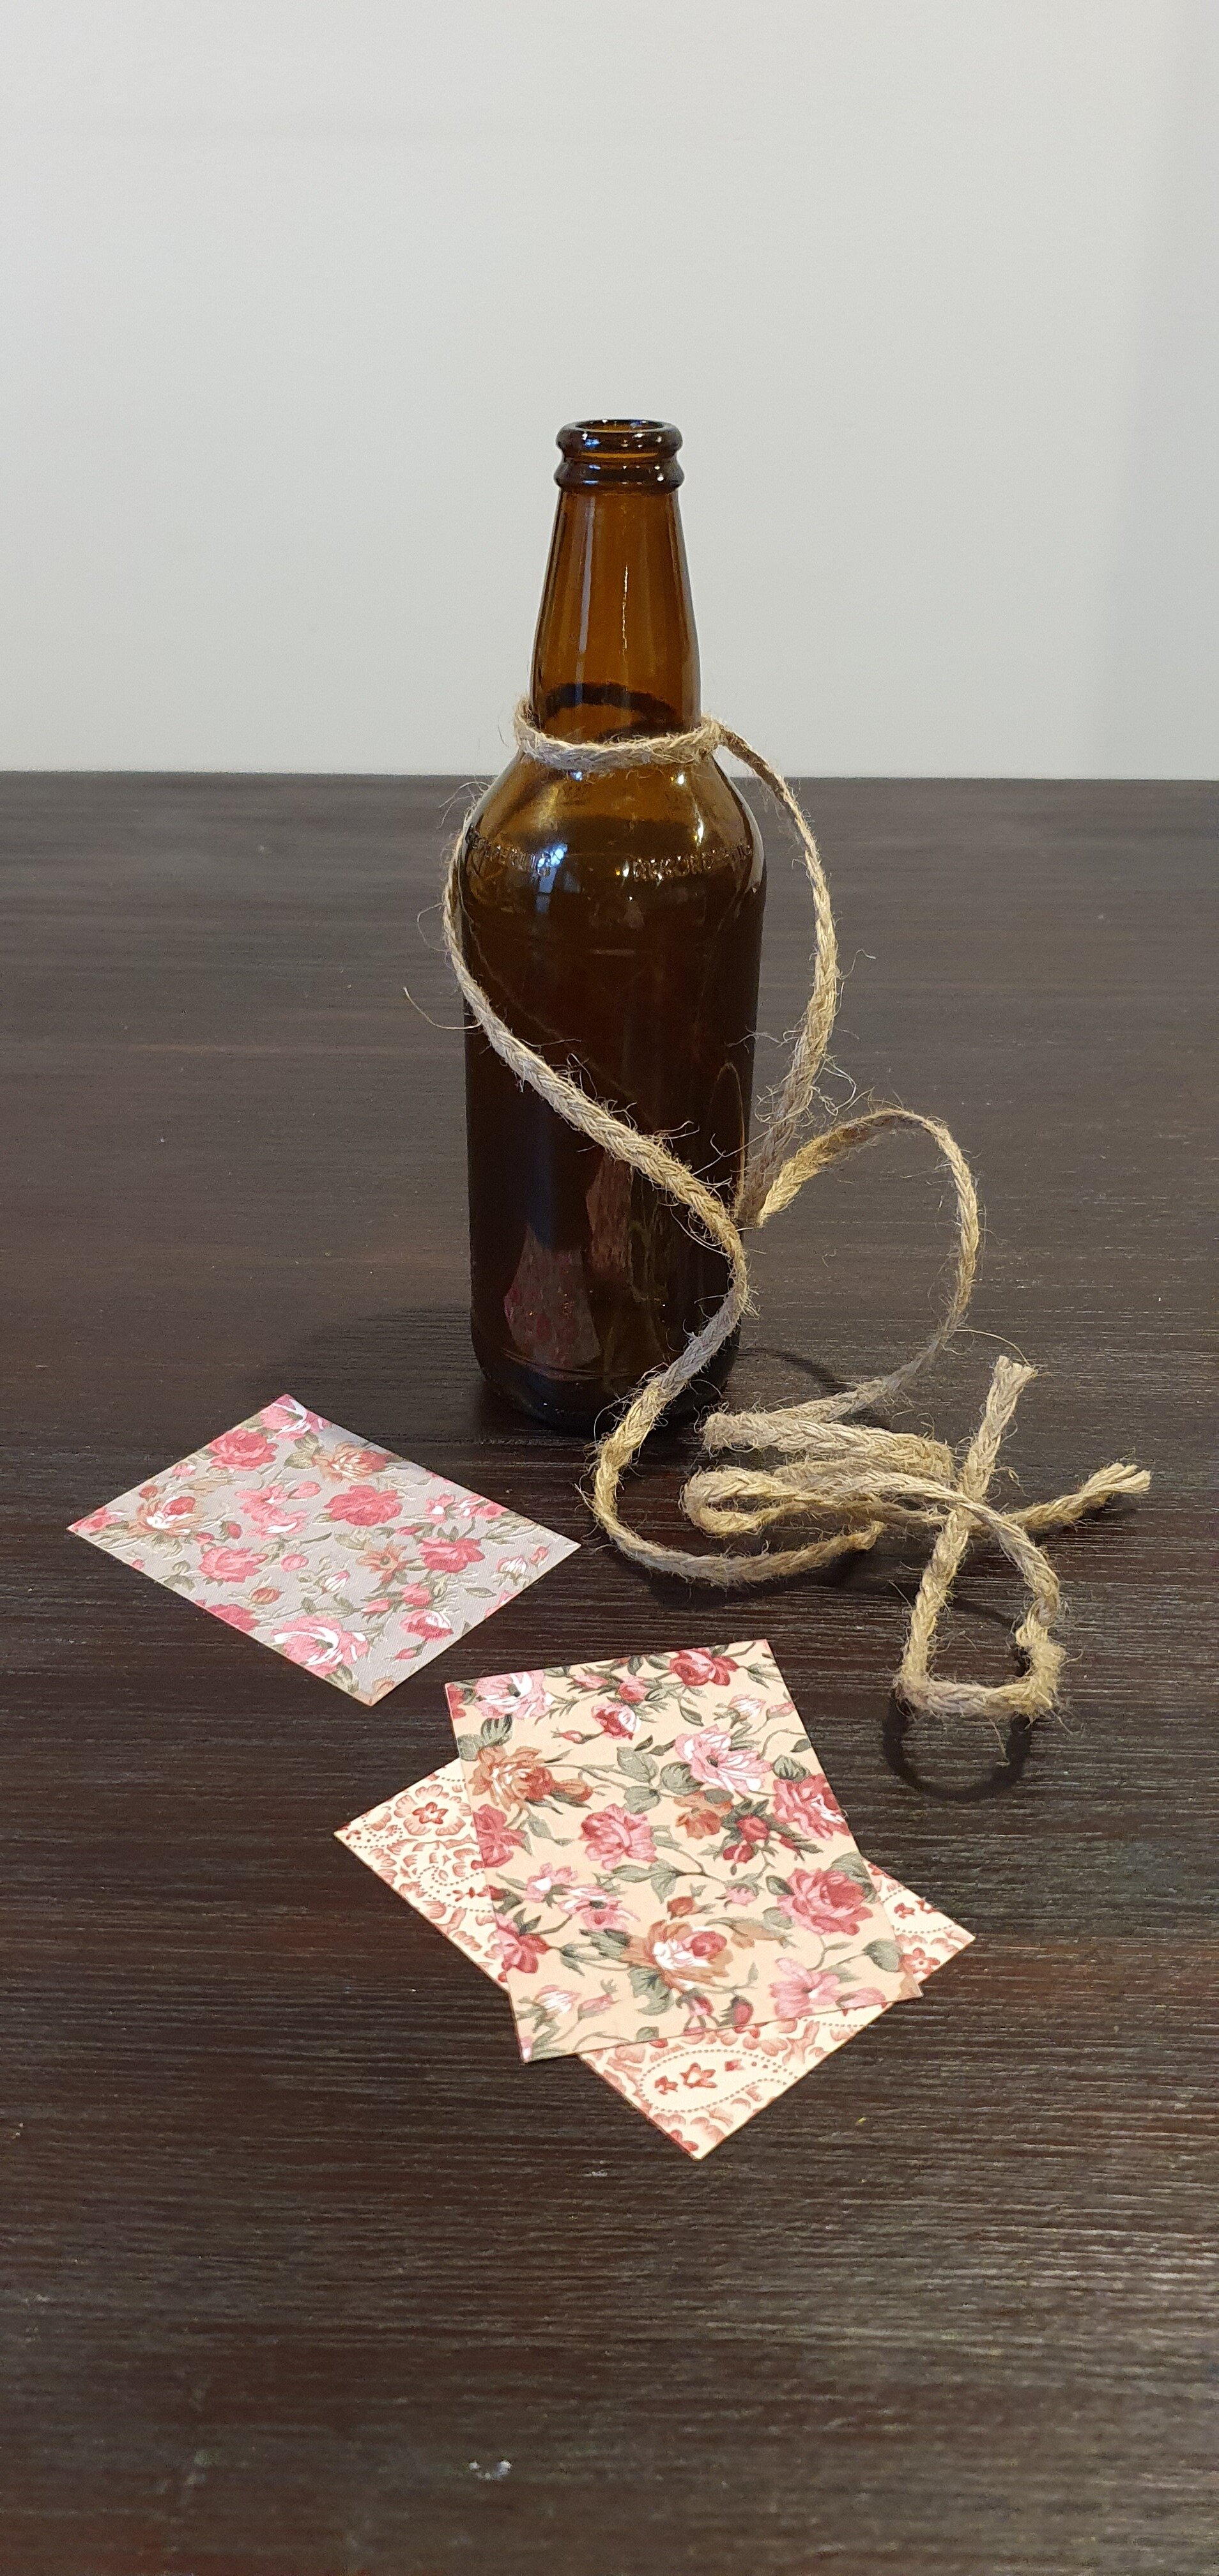
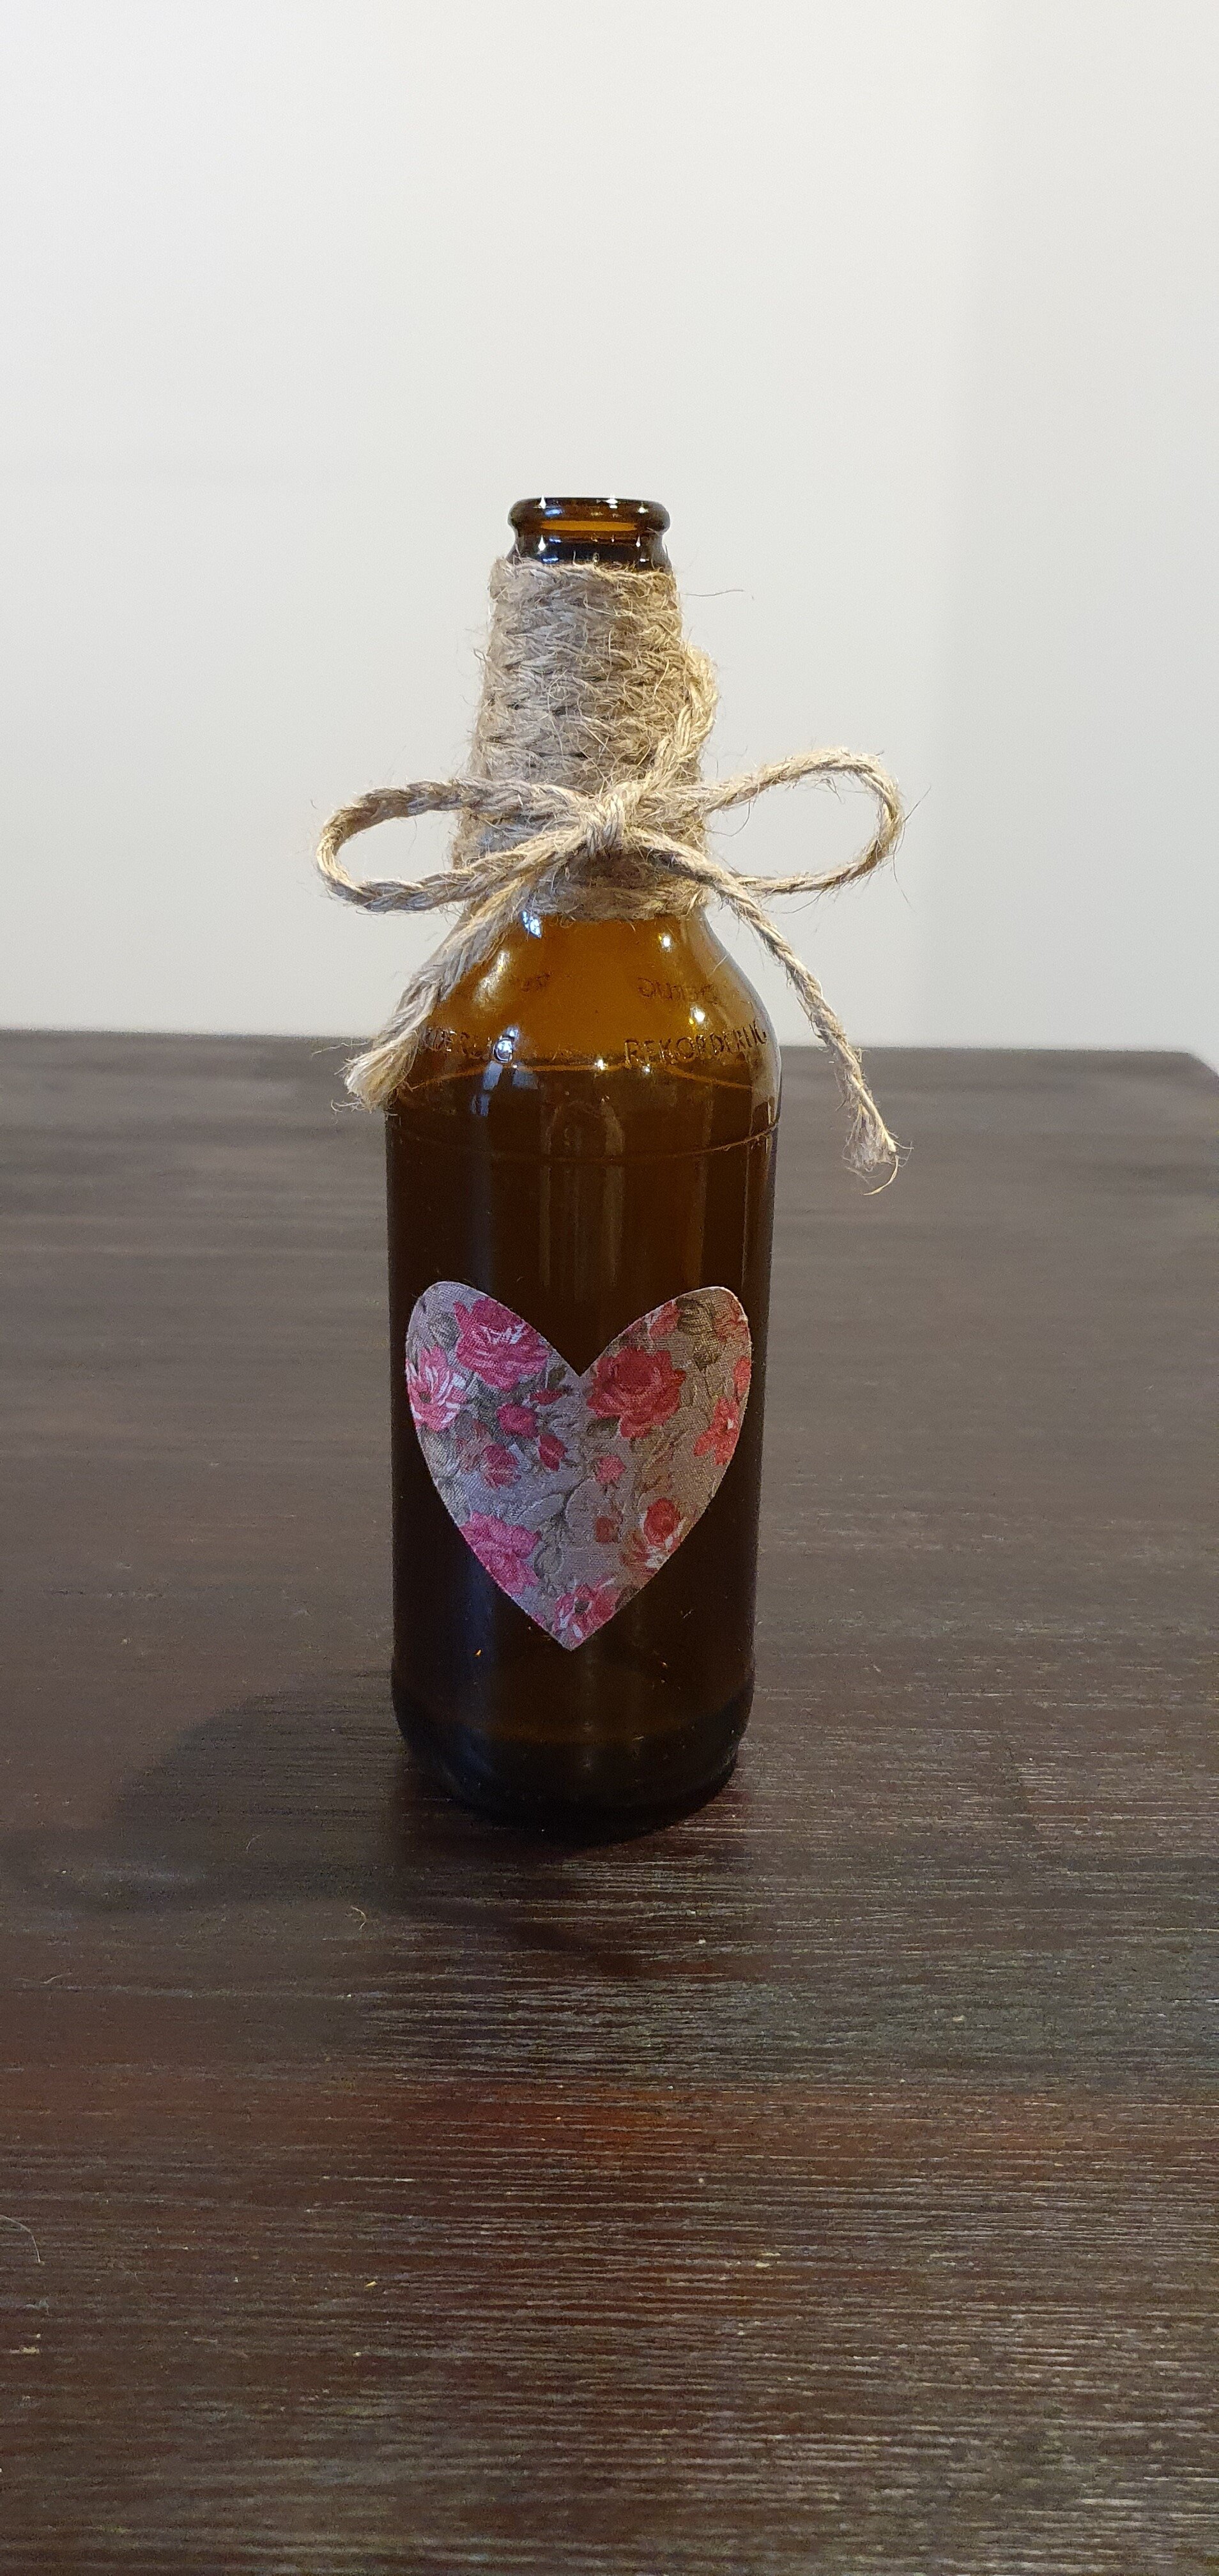
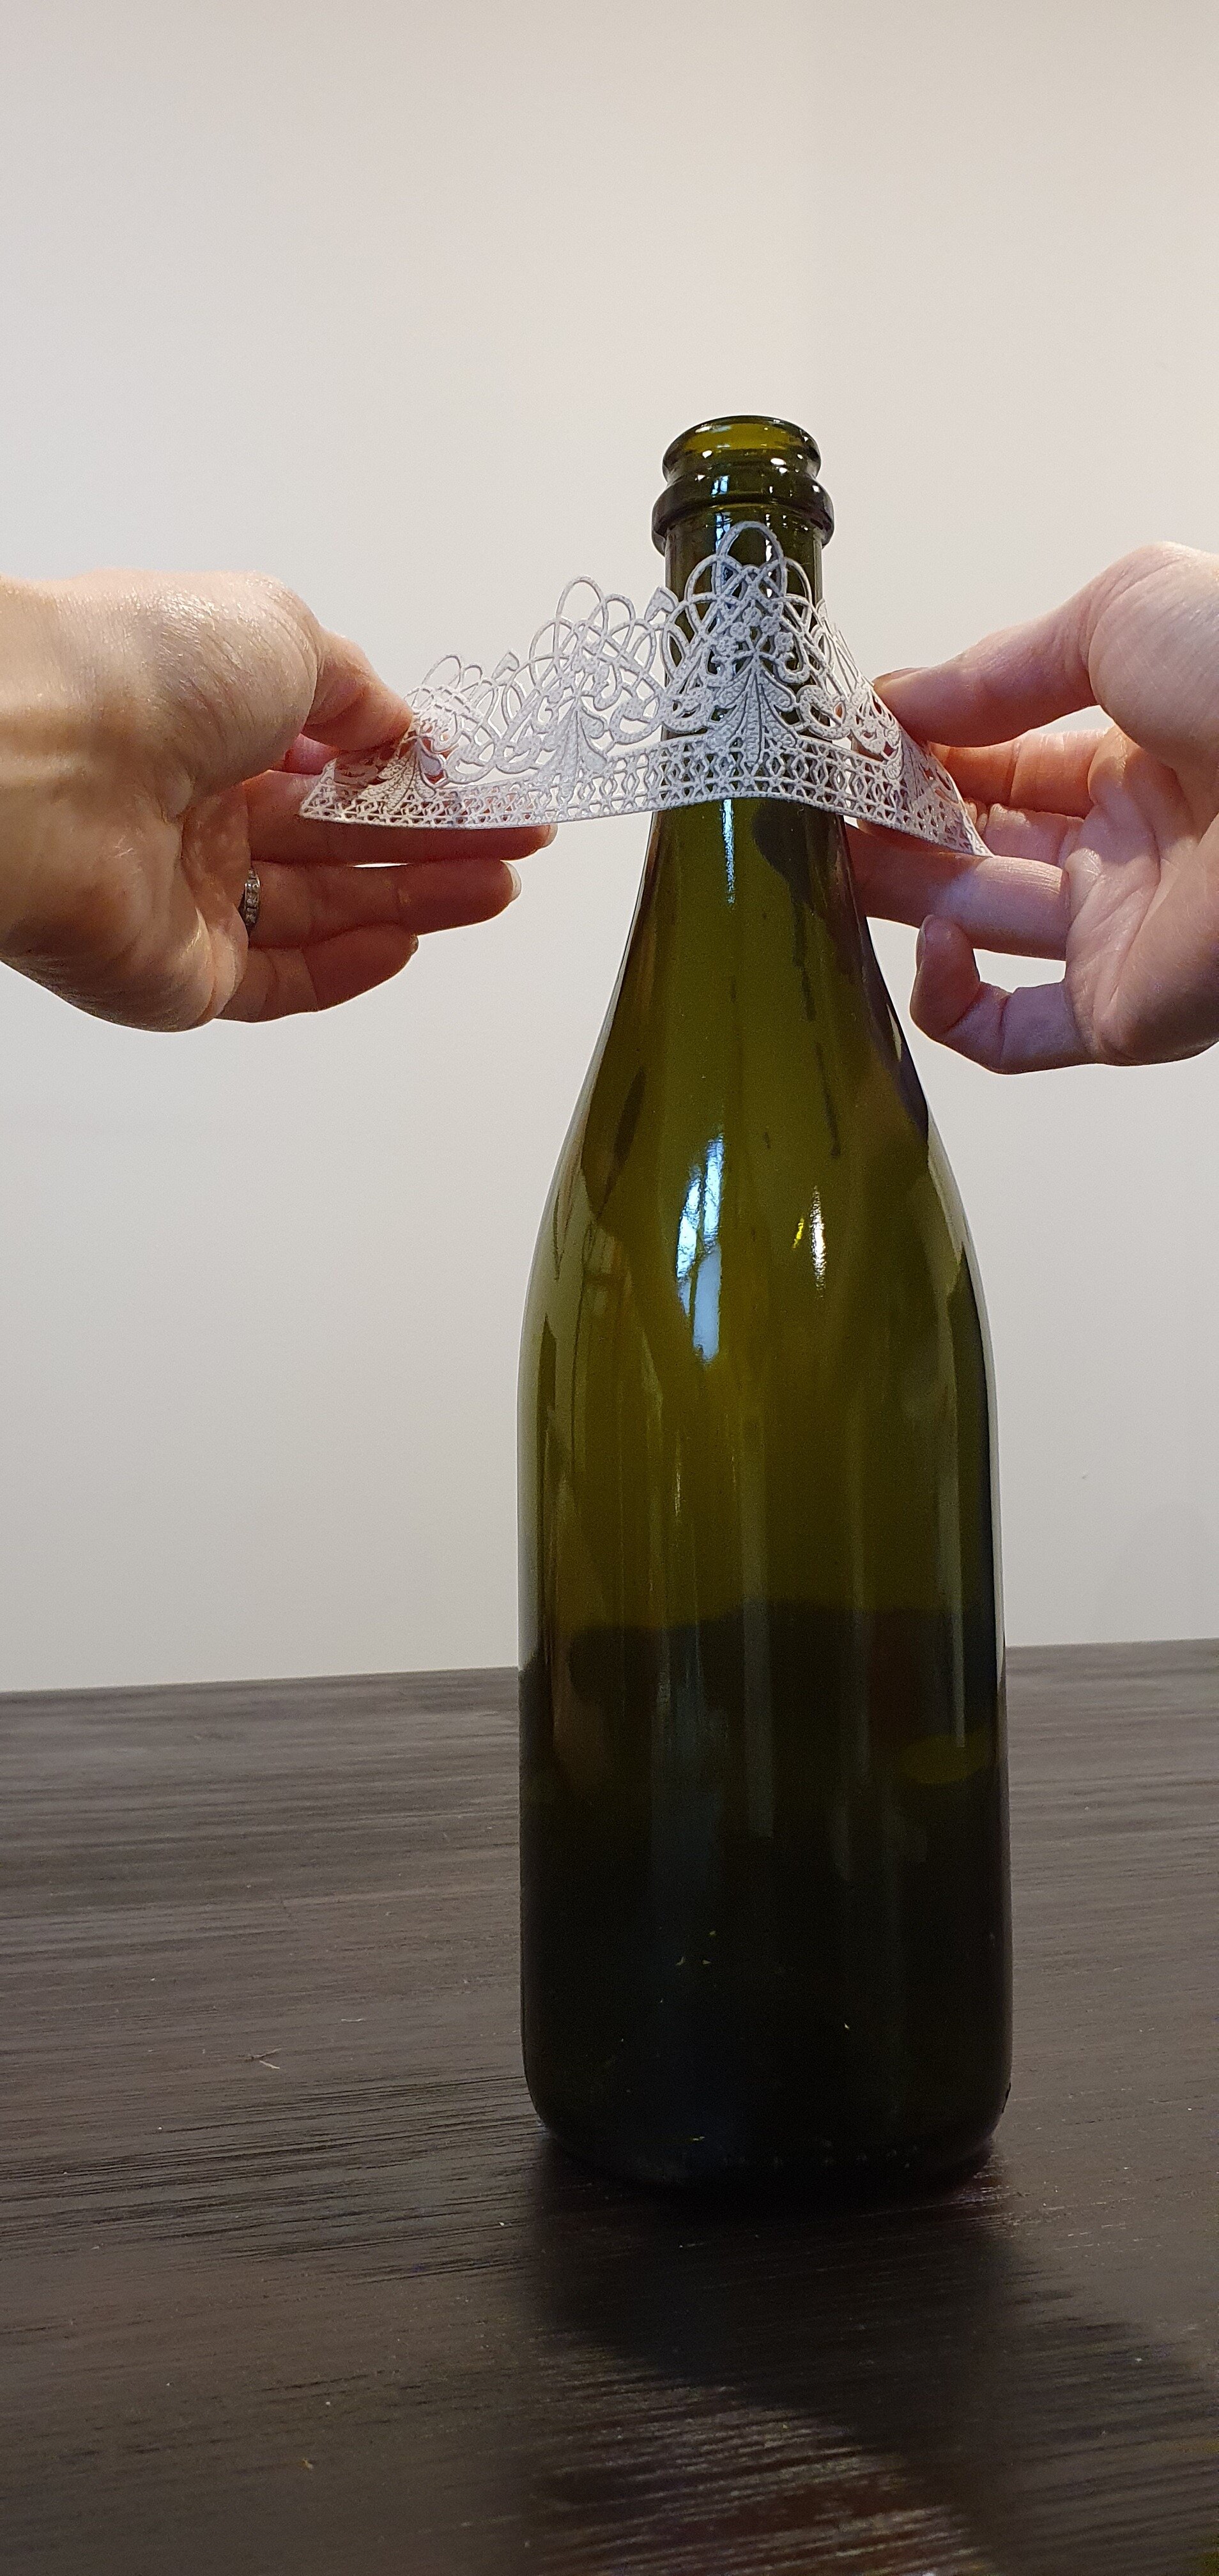
Now, to layer your creativity atop your homemade table runners. For this easy tablescape, grab any old glassware that you’ve collected. I’ve featured tequila, wine and cider bottles along with an old mason jar and wild flowers strewn amongst the glassware. To remove bottle labels, simply soak the bottles in hot soapy water overnight. The labels should peel right off. Any glue residue needs a gentle scrub with a soapy sponge.
To decorate the bottles, I’ve sourced rope, floral adhesive fabric and lace stickers from a local craft store. Cut the shape and size of the stickers to your liking, wrap around some rope and insert flowers or tapered candles for a chic rustic feel.

Copy & Paste
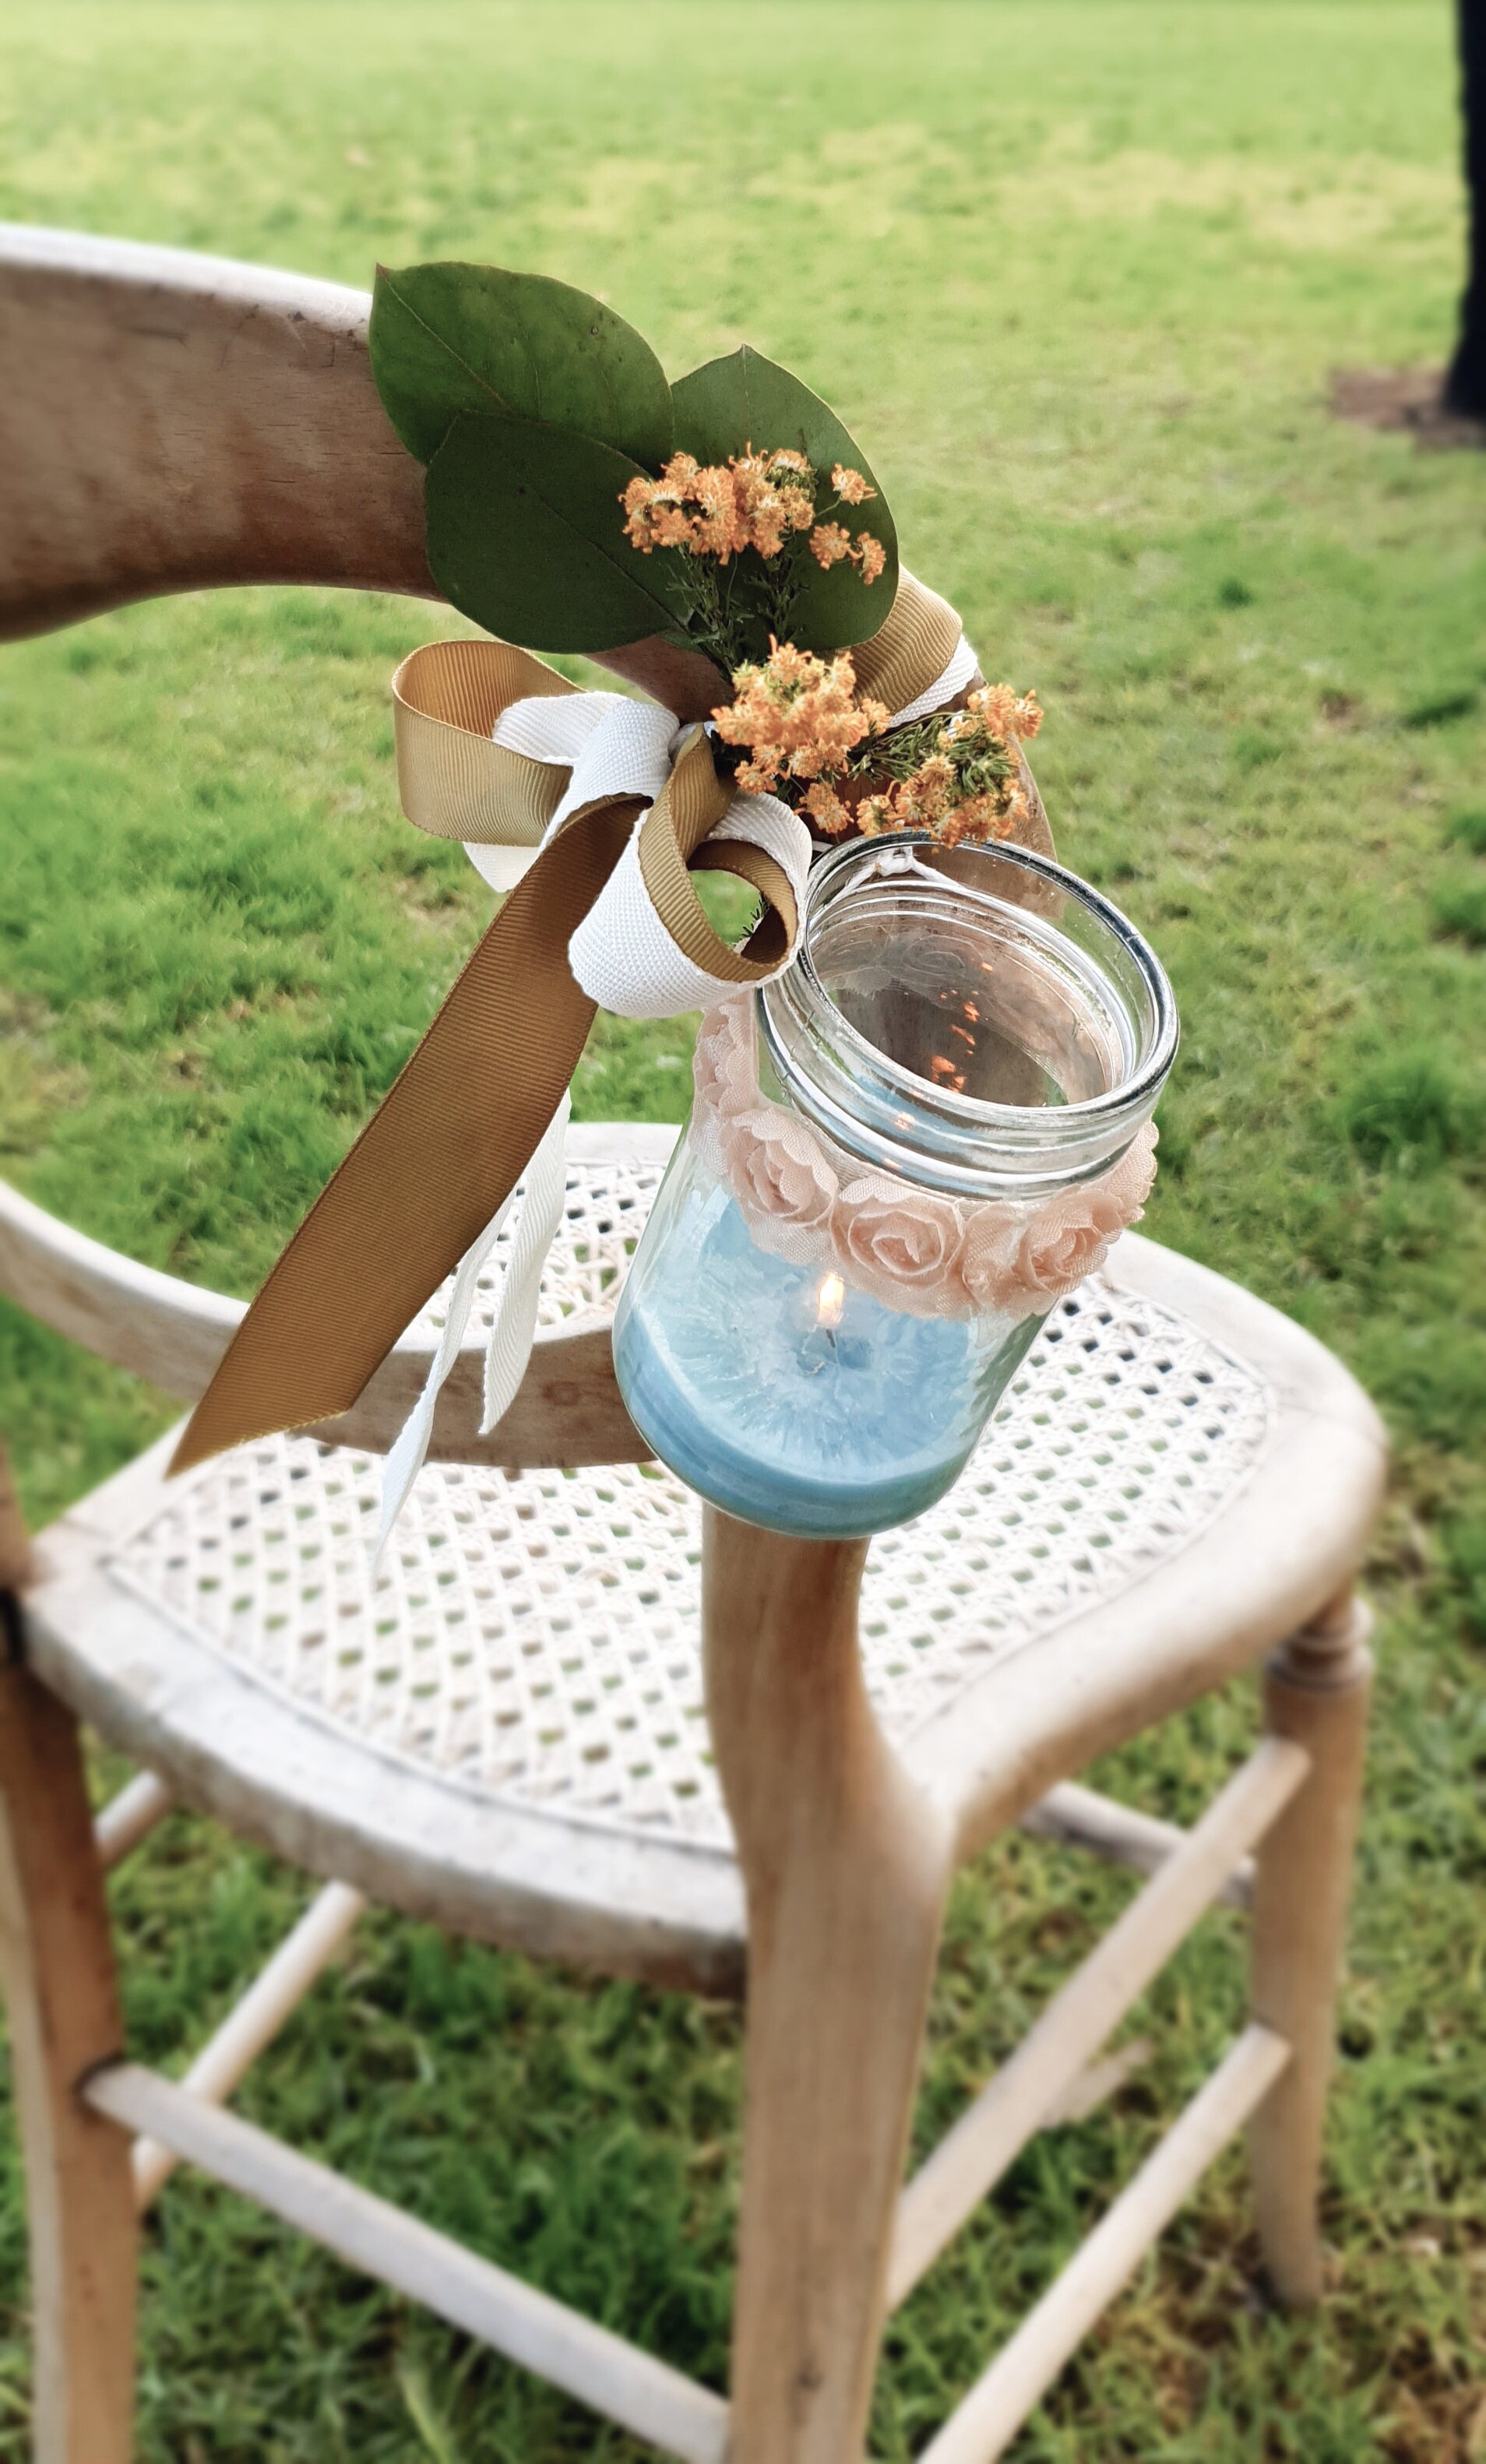
Replicate the style of your centrepieces throughout the venue. As Bohemian picnic areas are trending with outdoor weddings at the moment, I’ve recycled leftover burlap and floral adhesive fabric from my table settings to create bunting for an outdoor seating area. Use paper to create the stencil. Attach the flags with string, and centre the hearts. Easy done!

Simulate your table arrangements by hanging jars from trees, exposed beams and chairs backs or line them down the aisle. On a grander scale, use large galvanised bucks and taller flowers to adorn your alter or arbor. Just keep the wind in mind when using candles outdoors. Battery operated tea lights also serve well for venues that don’t allow open flames.
The Píece De Résistance
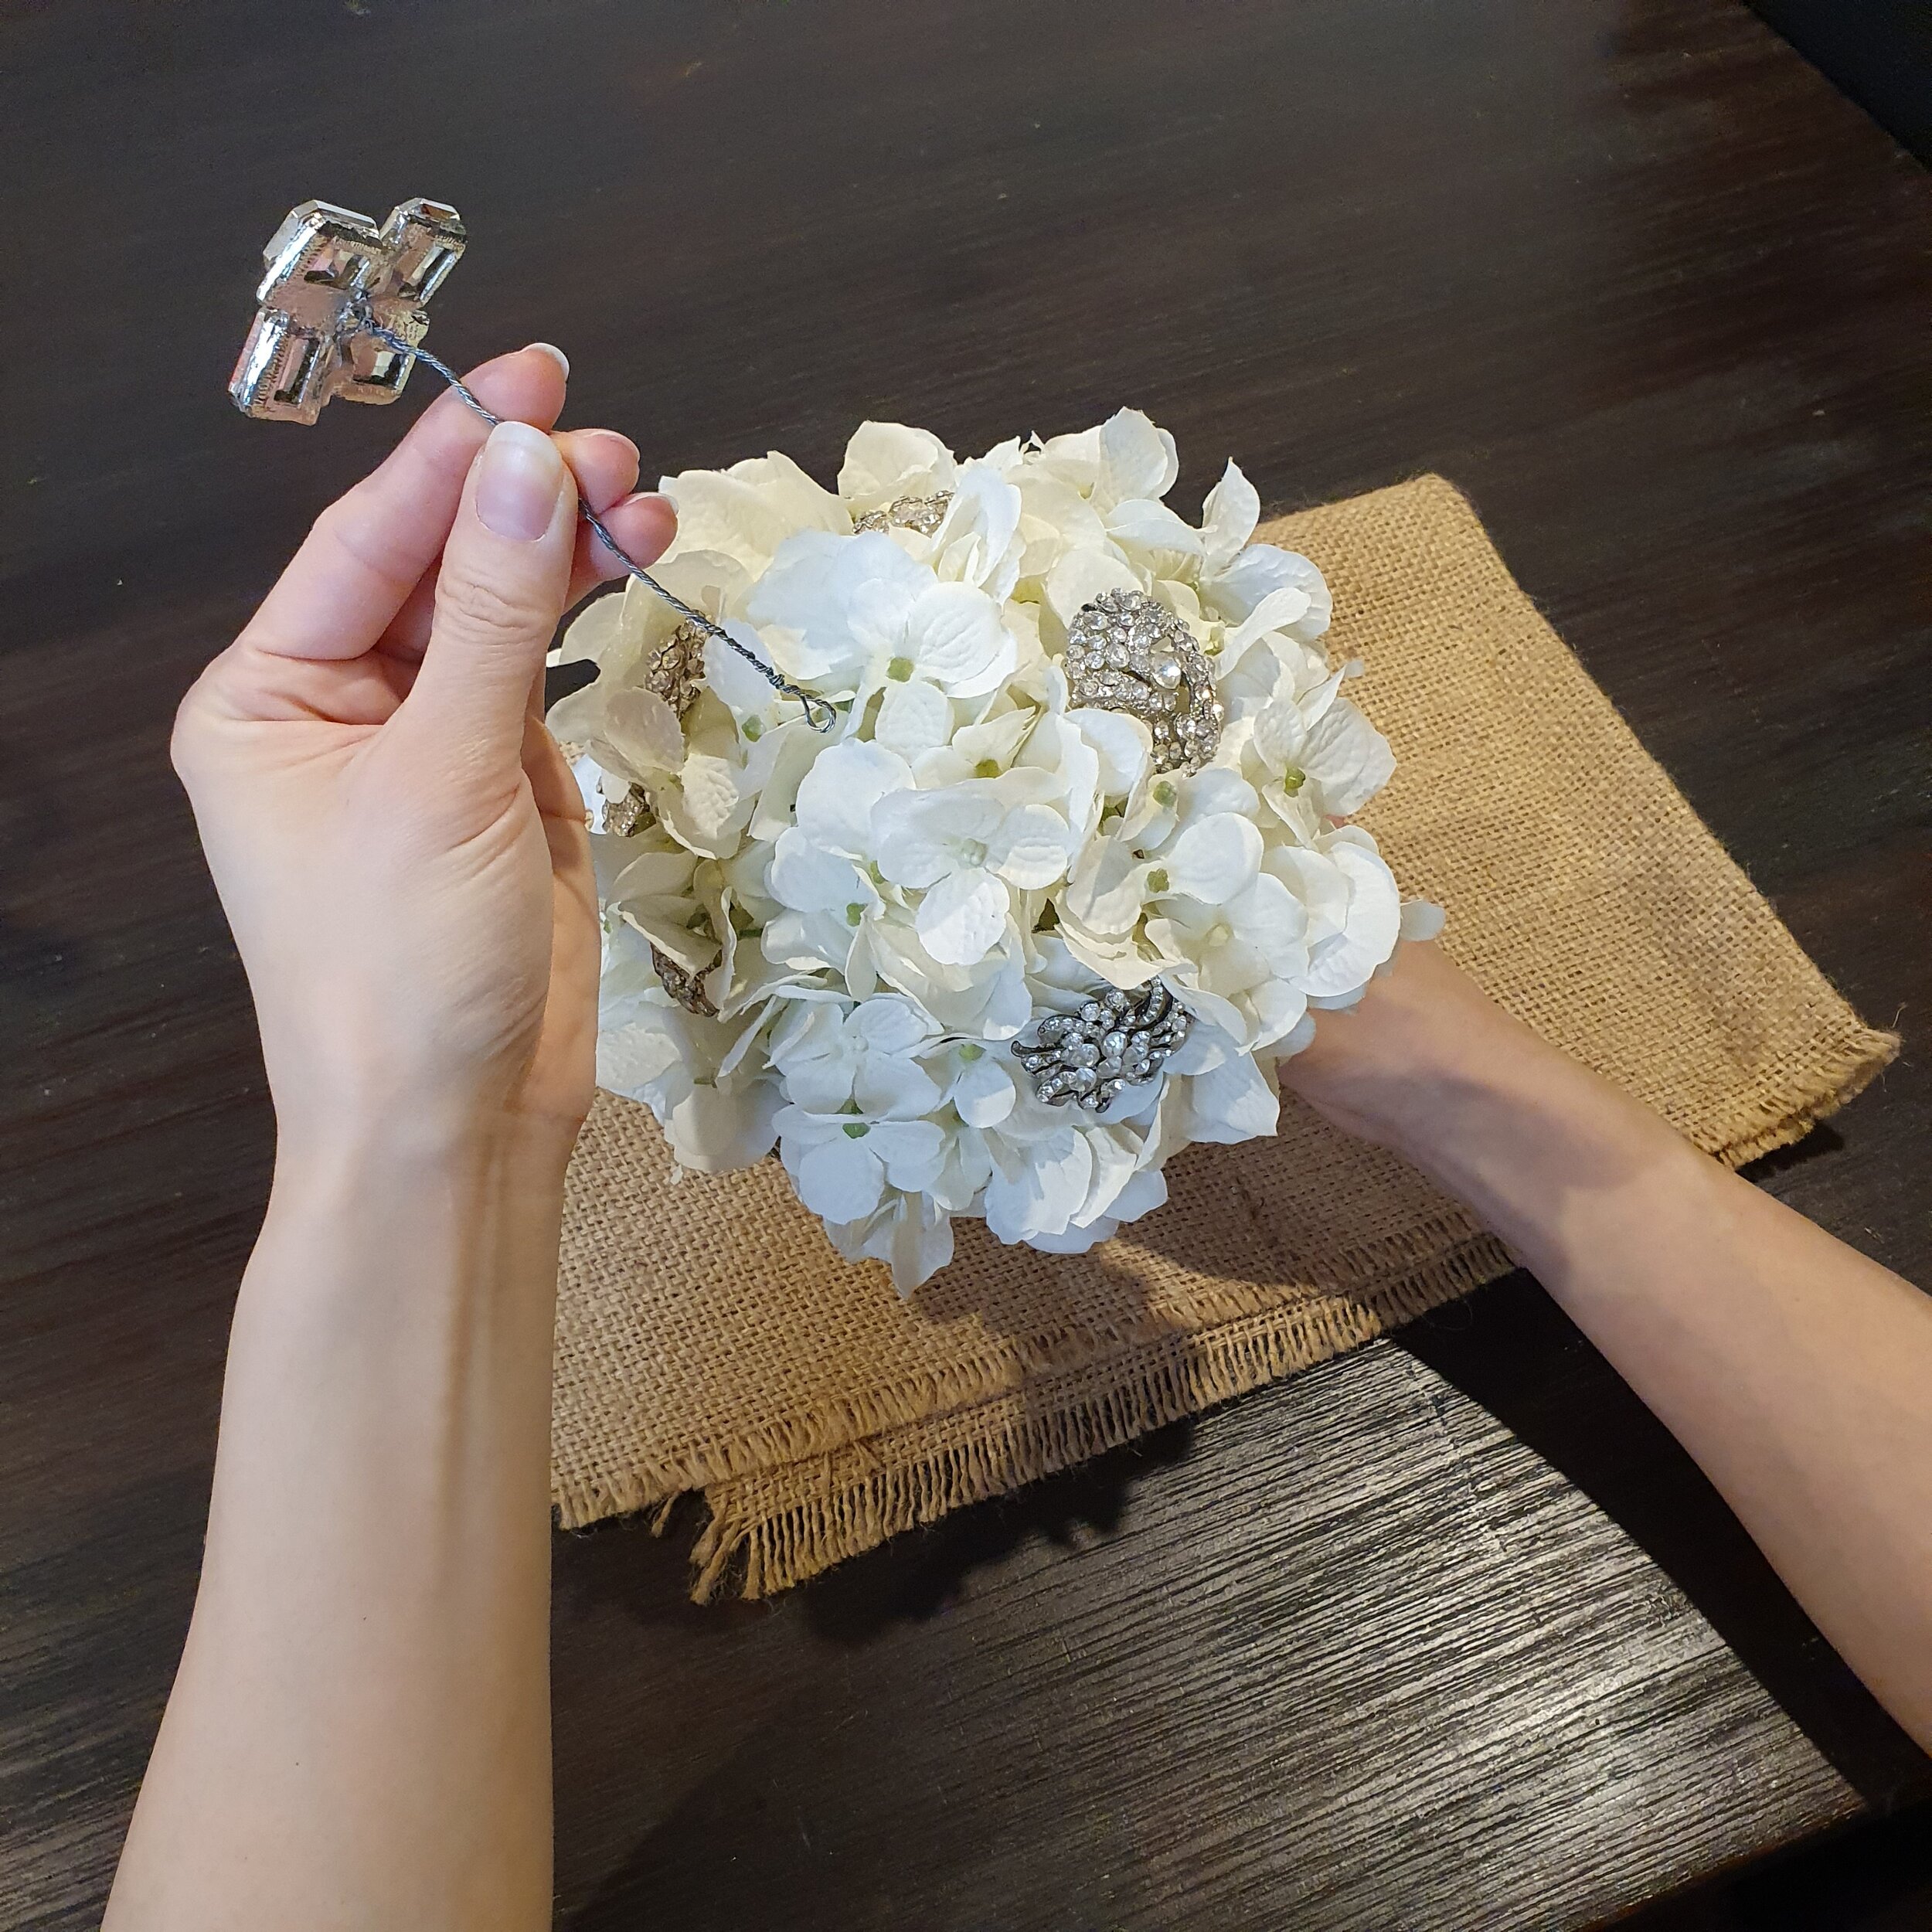
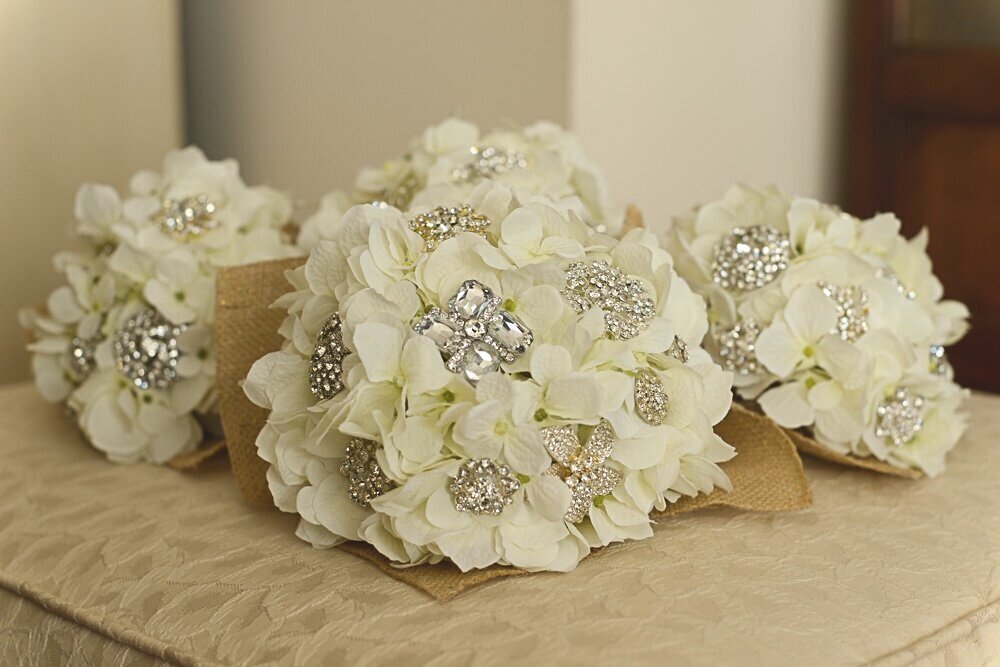
I featured a gorgeous home-made bouquet in a previous blog post, Plan A First Rate Wedding On A Tight Budget. Fresh flowers are beautiful, but ever since the internet teased my eyes with the most awe-inspiring brooch bouquets, I knew I had to carry one. But $400 a pop?! Yikes! I decided that a couple handfuls of faux hydrangeas, a few dozen brooches, metal wiring and left-over hessian from my DIY table runners would make equally breathtaking bouquets that I could keep to show my grandkids. I couldn’t be more content.
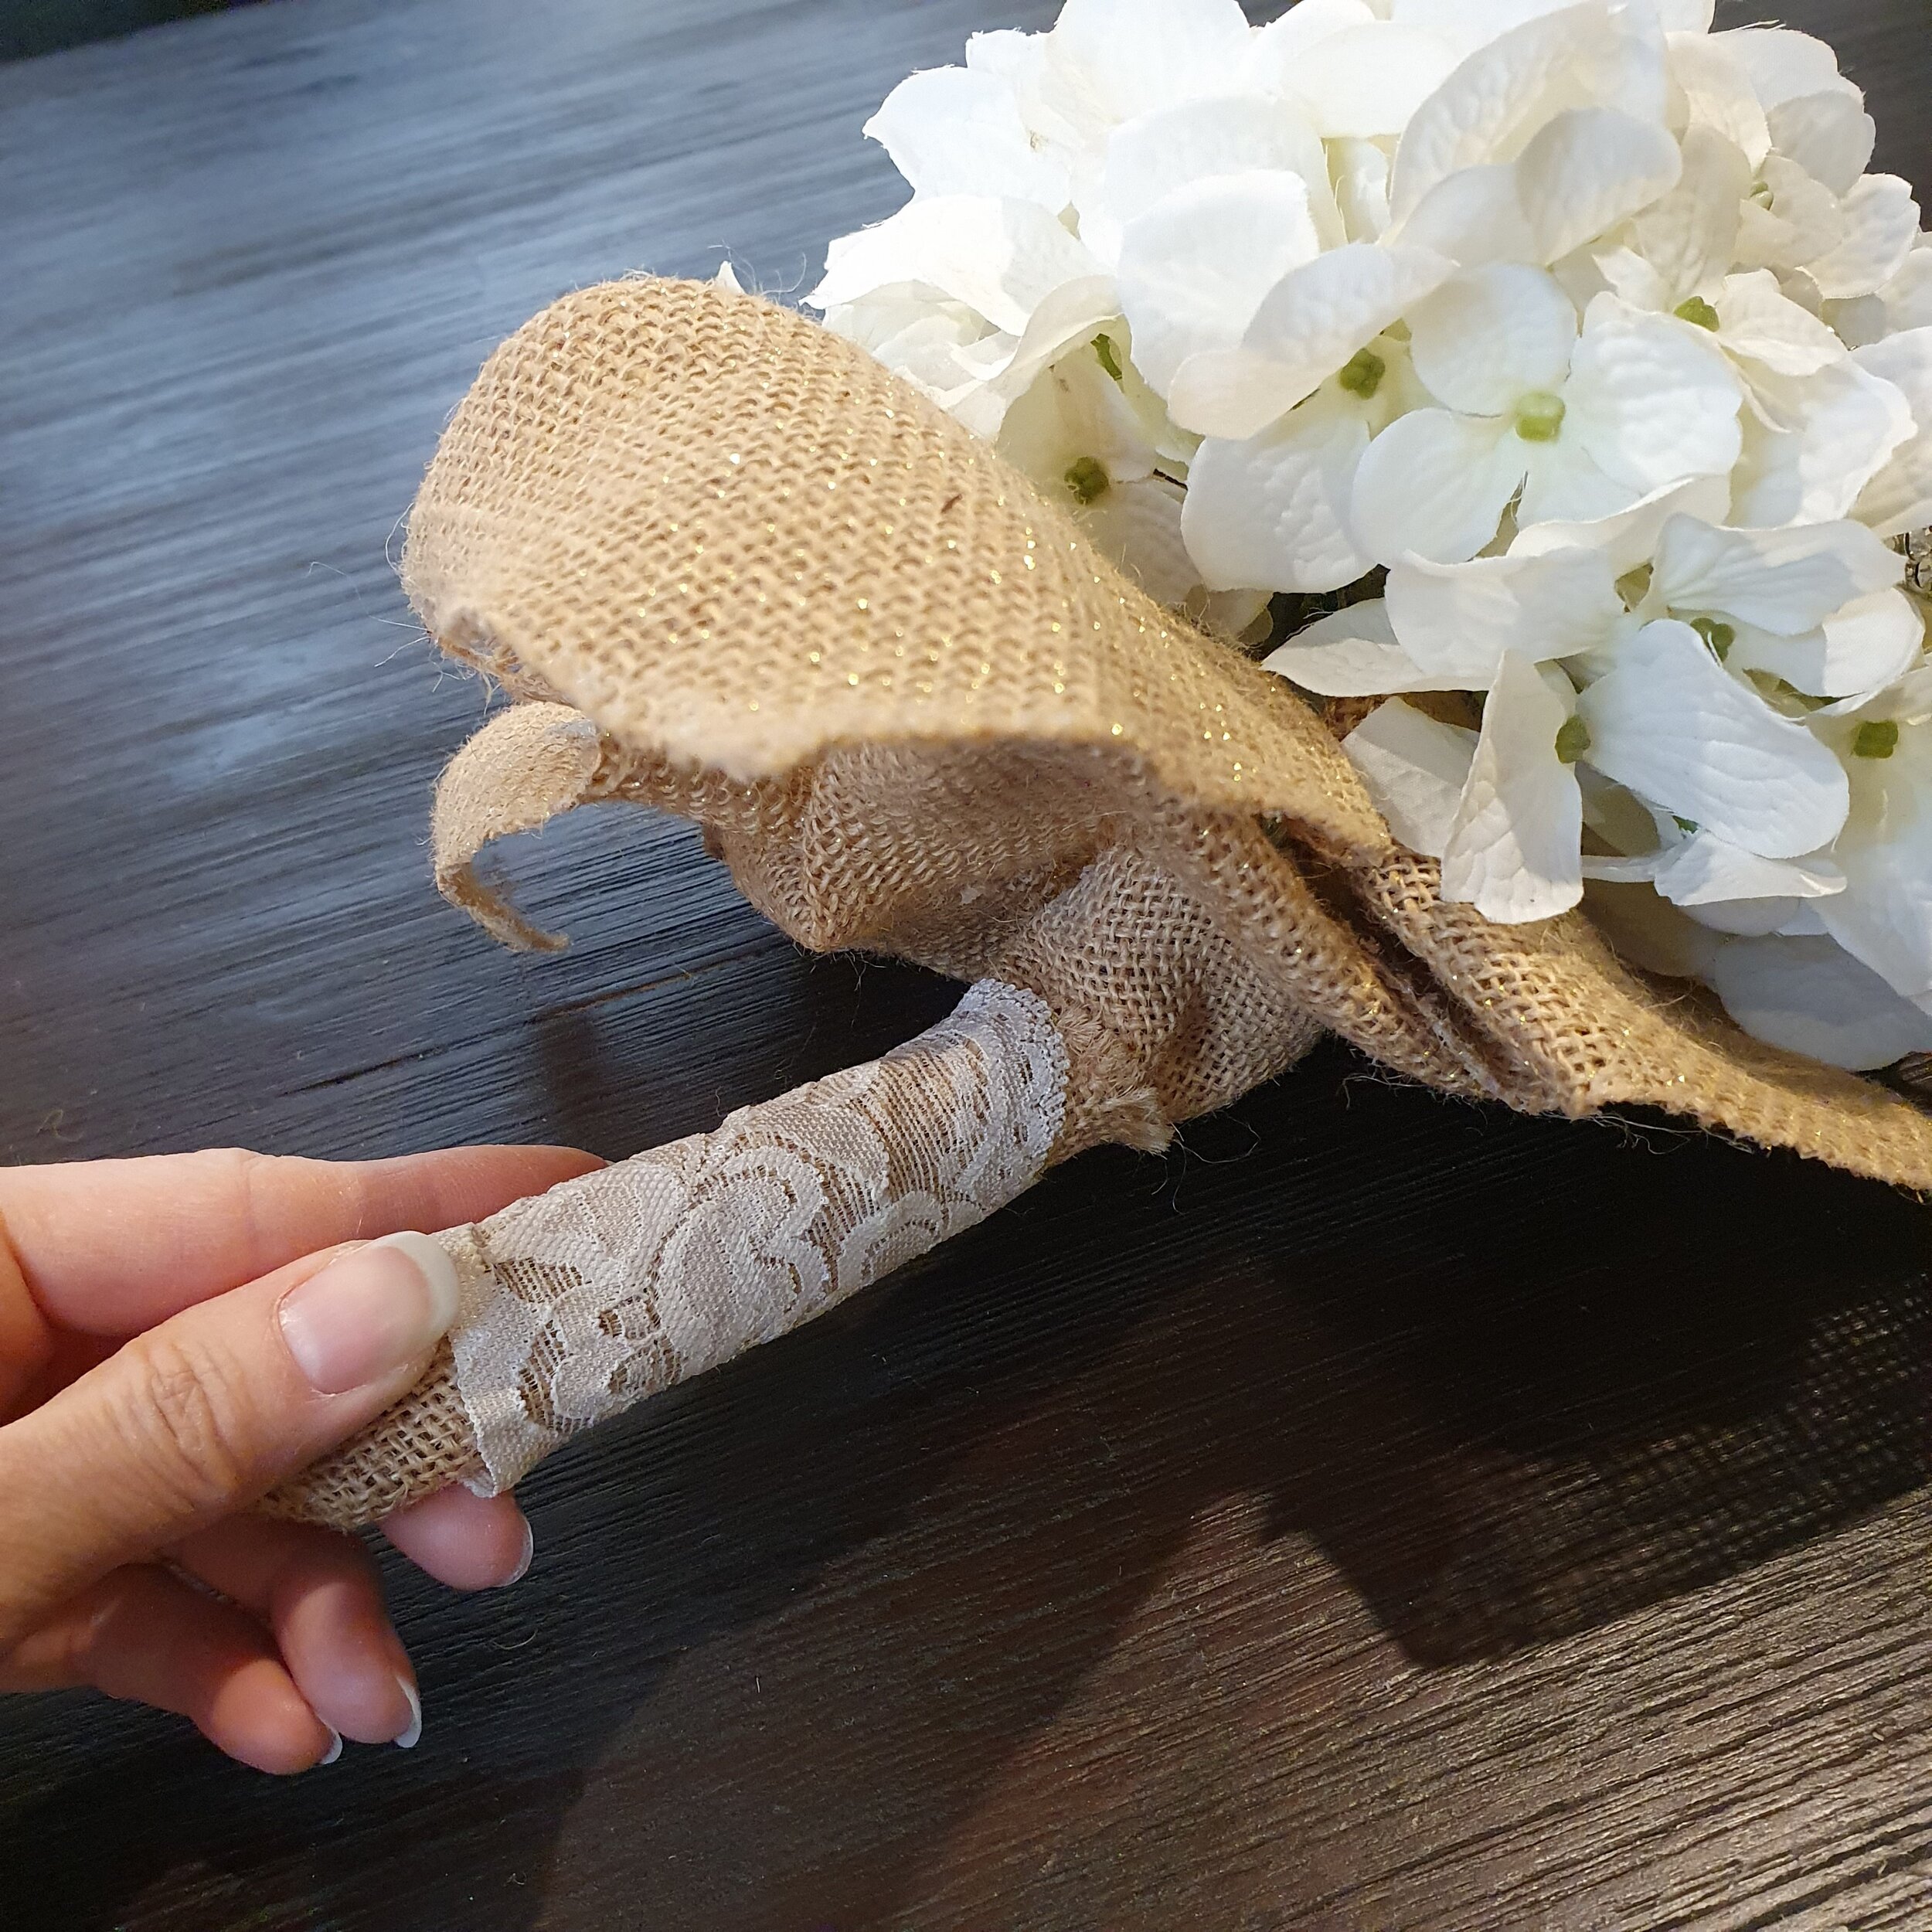
Wrap thick wire around each brooch ($2.50 from a fabric store) to create stems. The weight of the brooches will cause thinner wire to bend. Thread the brooch stems through the flowers and attach securely underneath. Cover all the stems with your hessian off cuts and wrap in a bit of white lace to carry over the wedding theme. Make sure to bend the bouquet stem 90 degrees to face the bouquet outward when held in your hand.

Thank You Cards
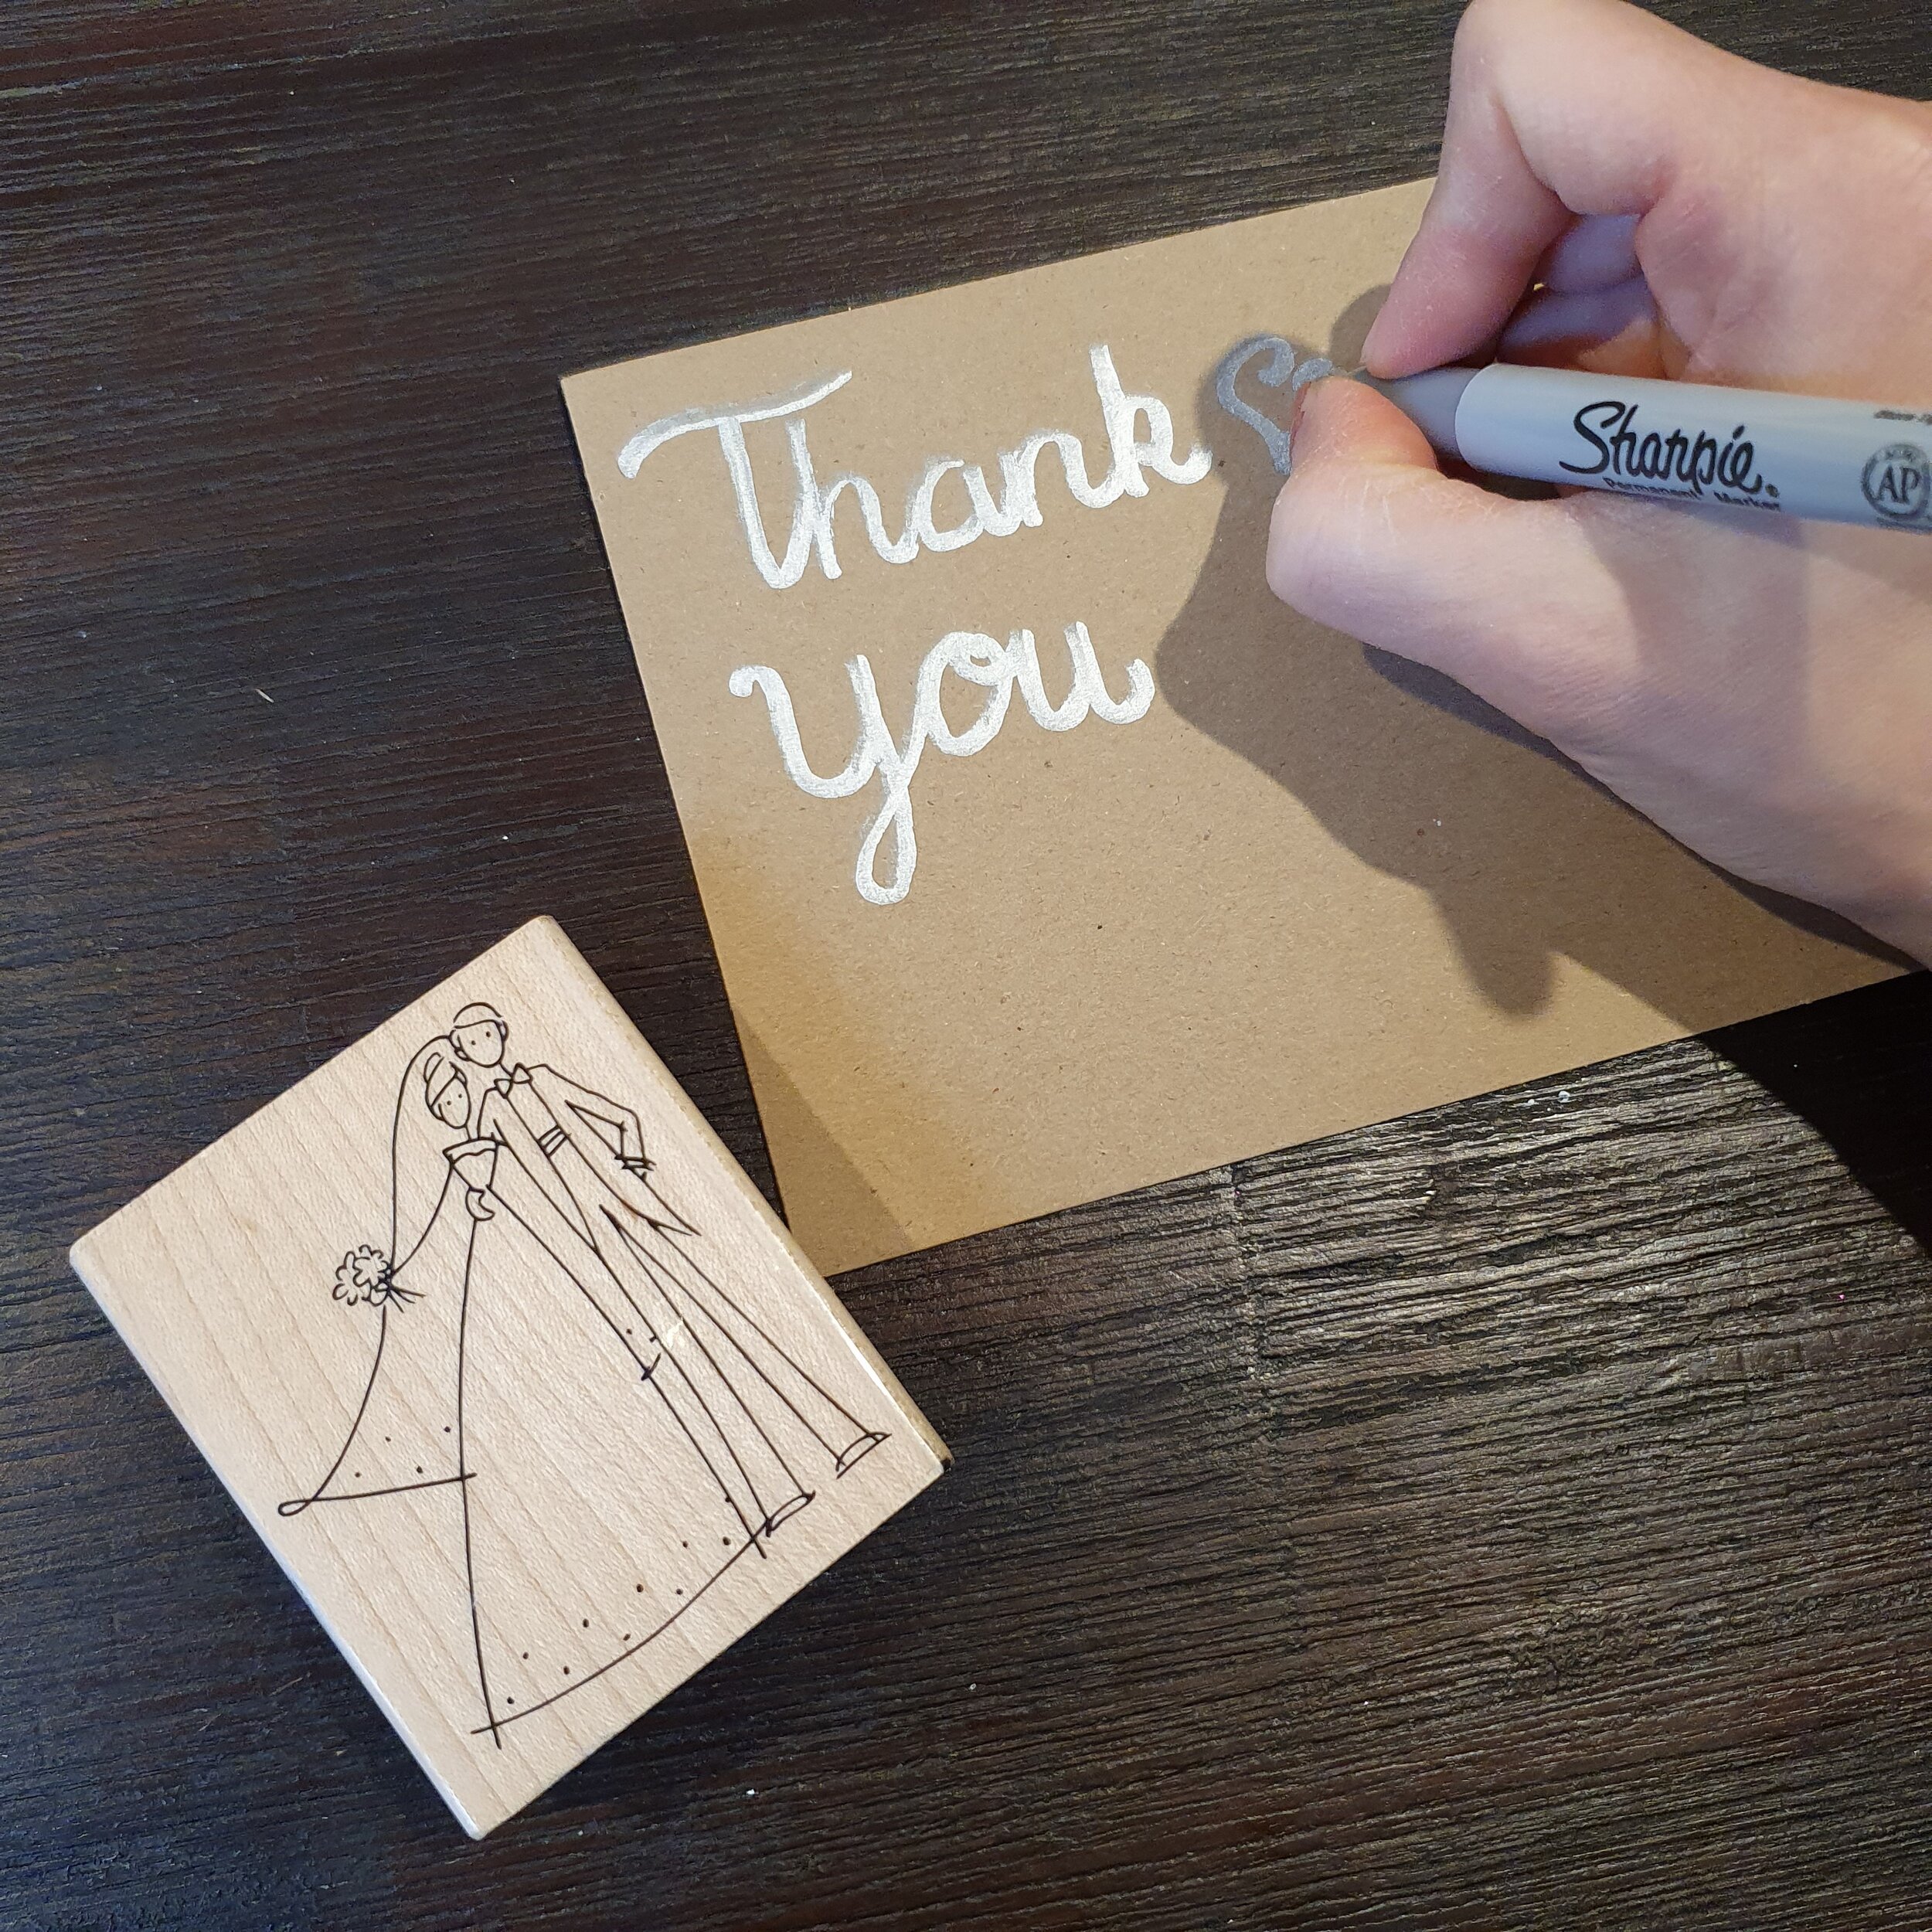
Keep up the theme even after your wedding. You may have spent a pretty penny on invitations, but why fork out the same for Thank Yous? Guests appreciate hand written notes. Go the extra mile and personalise the card too. Pick up blank kraft cards, matching envelopes and a metallic pen from the stationary section at Kmart or your local dollar shop.
I found a nice simple font online and practiced a few times on paper until I was prepared to hand draw the cards. This rubber stamp was so sweet, I knew when I saw it that I would have to incorporate it into my wedding. But you will find little accents that you adore to personalised your cards.
Inside, you may want to add a snapshot from your wedding for special touch. You also may want to buy an inexpensive roll of address labels to pretty up the envelope.

A huge difference with DIY decor and renting your decor is that you will be left with all your accessories after the wedding. So head onto Facebook Marketplace, eBay or your local resell website and make a small buck while helping out a bride-to-be. Empty jars sell like hotcakes for the right price. There’s always someone who needs them for pickling or jams. Repurposing your decor is another great way to recycle and keep things out of landfill. Subscribe below to read more ways to have a sustainable wedding.